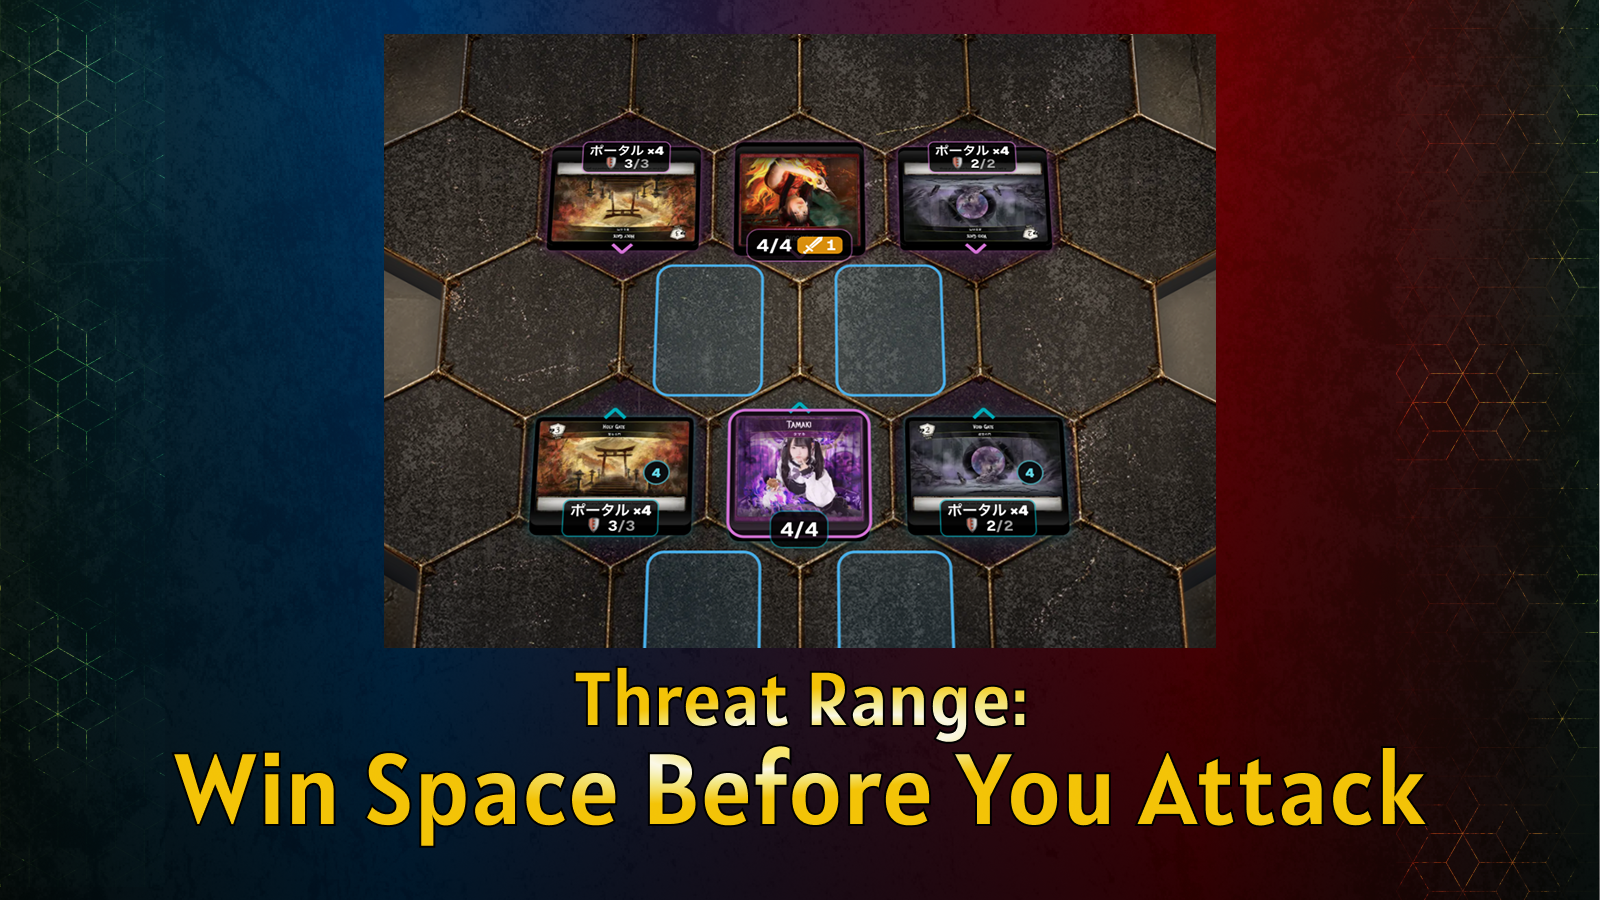
A unit influences more space than the hex it currently occupies.
Its movement, attack possibilities, abilities, and potential support create a threat range around it. Opponents must respect that range even before an attack happens.
Understanding threat range allows you to control space without spending an action on combat.
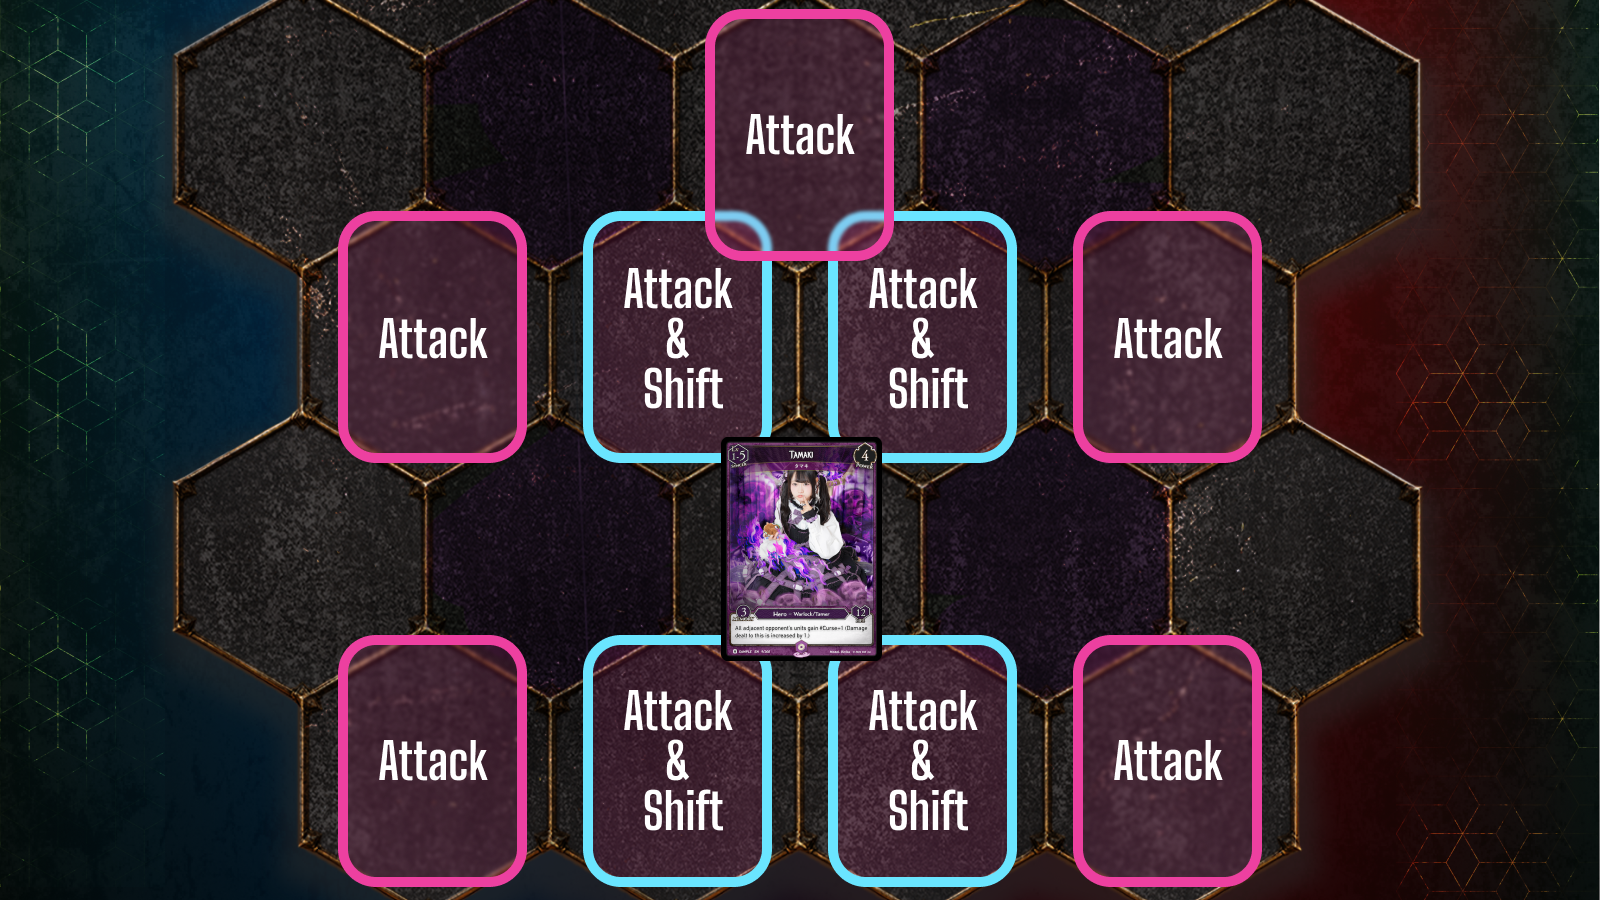
Mark the Immediate Threats
For each important enemy unit, identify:
- What it can attack now
- What it can reach after one Shift
- Which allies can extend or protect its threat
- Which Portal or Hero route enters that range
Players often notice immediate attacks but miss the spaces that become dangerous after movement.
Create Overlapping Threats
One unit threatening a hex may not stop the opponent.
Two units threatening the same hex create a much stronger deterrent.
Overlap is especially valuable near:
- Portal approaches
- Central crossing points
- Escape routes
- Summoning or support positions
This allows you to direct movement without physically occupying every space.
Use Threat to Protect a Weak Unit
A weak or damaged Spil does not always need another unit standing beside it.
Place a stronger unit where it threatens anyone who approaches.
This indirect protection avoids clustering and allows the stronger unit to remain active elsewhere.
The opponent must decide whether removing the weak unit is worth entering the stronger unit’s threat range.
Attack Only When the Space Gained Matters
Threat is often more valuable before the attack.
Once a unit attacks or moves into a committed position, the opponent may gain a safe route around it.
Before attacking, ask:
- Does this attack remove an important blocker?
- Will I control a new hex afterward?
- Does the attacker remain protected?
- Am I giving up pressure on another target?
Force the Long Route
A well-positioned threat can make the opponent travel around one side of the battlefield.
Even when no combat occurs, the opponent may spend additional movement, arrive one turn later, or separate their formation.
That lost time is tempo.
Use your units to make the shortest route dangerous, then prepare for the longer route the opponent is likely to choose.
Hide the Full Threat
A unit may threaten more than the opponent can immediately see if you have:
- A movement effect
- A summoning option that adds support
- A way to change adjacency
- A second unit that can clear a route
Allow the opponent to move into a position that appears safe, then complete the range when it creates meaningful value.
Threat Range Checklist
At the start of each turn, identify:
- The most threatened friendly objective
- The enemy unit with the widest practical reach
- One hex both players want to control
- One route you can make inefficient without attacking
- One of your threats that should remain uncommitted
Threat range is how you claim that advantage.